
Easy Homemade Non-Toxic All-in One Bodywash & Shampoo Recipe
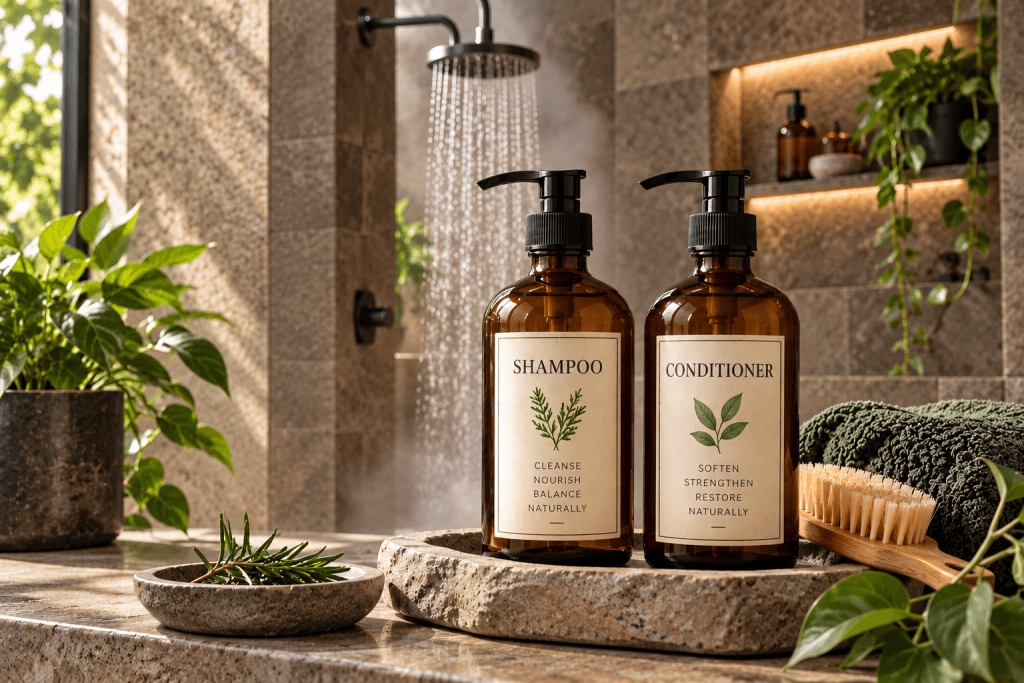
What’s Really Hiding Behind the Label?
We use shampoo and body wash almost automatically; lather, rinse, repeat. But how often do we turn the bottle around and actually look at what’s inside?
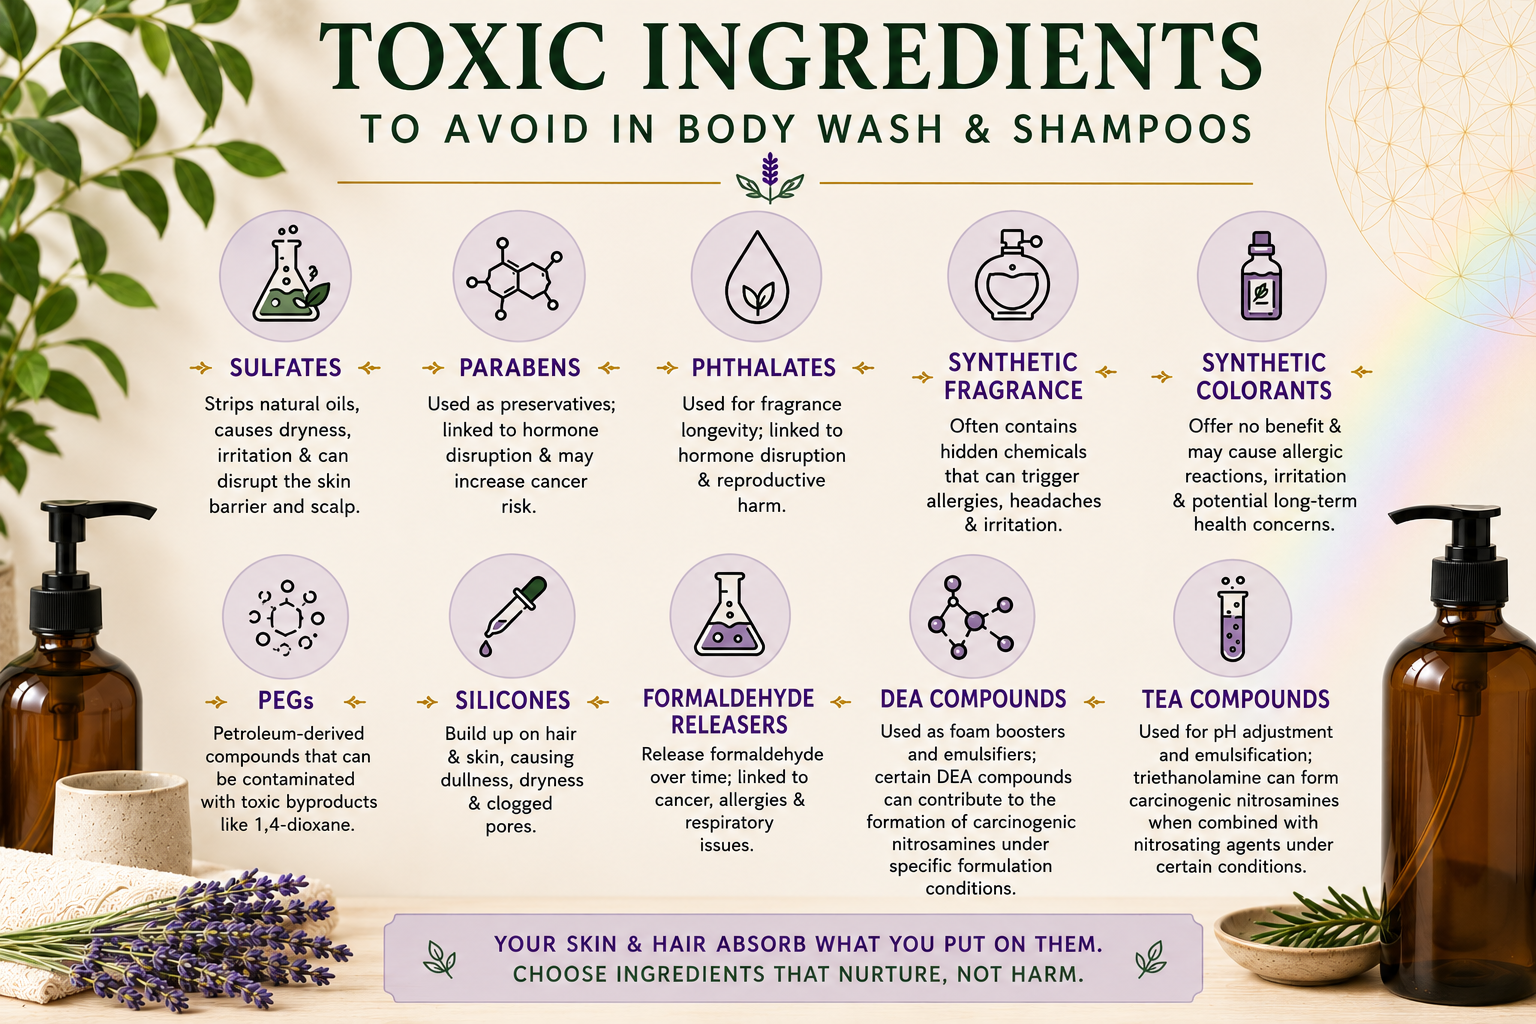
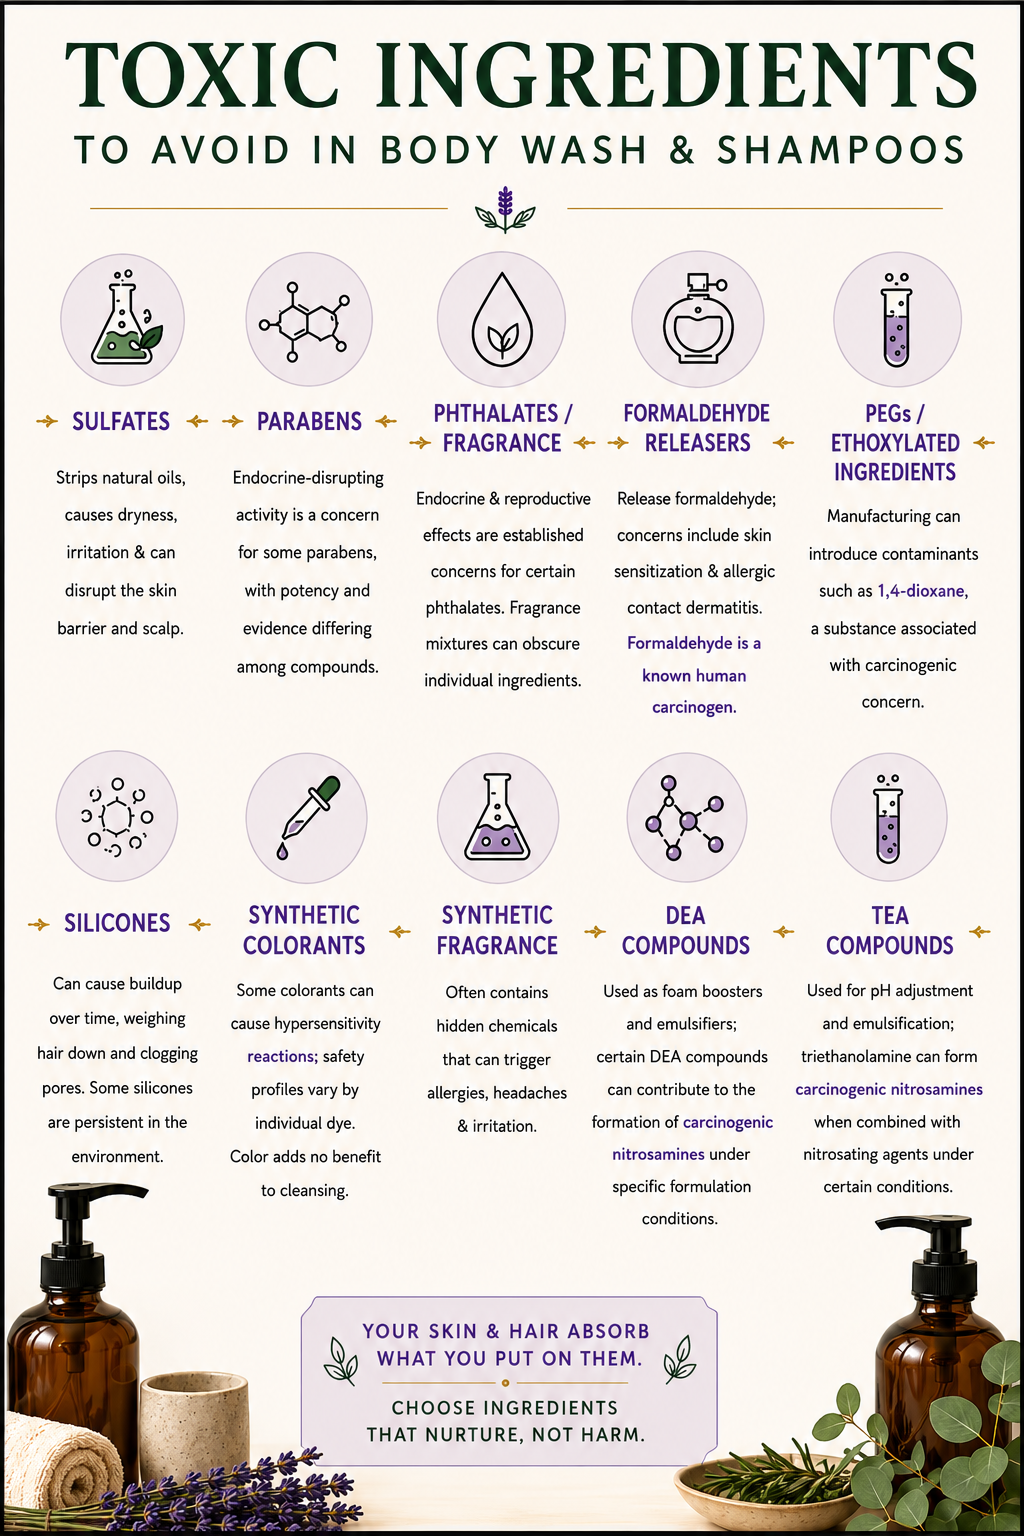
Many conventional personal-care products contain ingredients designed to make them foam more, smell stronger, look prettier, feel silkier, or remain shelf-stable for years. Some of these ingredients are relatively benign for most people. Others deserve a closer look because of concerns surrounding irritation, sensitization, endocrine activity, environmental persistence, or simply how frequently we’re exposed to them.
You don’t need a chemistry degree to make an informed choice. You just need to know what you’re looking at.
Ingredients to Avoid
Making Your Own Body Wash and Shampoo
There are many recipes out there that cater to different skin types. I recommend using your intuition on this one to determine what your skin may need more or less of. For example, those who live in a drier or colder climate may need more oil in their batch than someone who lives in a hotter, more moist climate.
Furthermore, not everyone can tolerate coconut oil especially those with nut allergies so this is another important factor to consider when selecting your natural ingredients.
Making your own body wash and shampoo is a simple yet rewarding experience that makes me feel more self-sustainable along with an opportunity to sharpen my discernment so I can continue making the highest choice for my family’s health, and well-being.
Essential Oils
Essential oils are a fantastic addition to any bathroom product however, skin-sensitive individuals and those with contraindications may require a little more care in choosing the right essential oil.
Photosensitive Essential Oils
Photosensitive essential oils should be avoided when considering your body wash and shampoo fragrance ingredients.
For example, there are several essential oils you want to be aware of, mainly your citrus types, that have photosensitive properties meaning they can become toxic when exposed to the sun or a tanning light which can burn the skin.
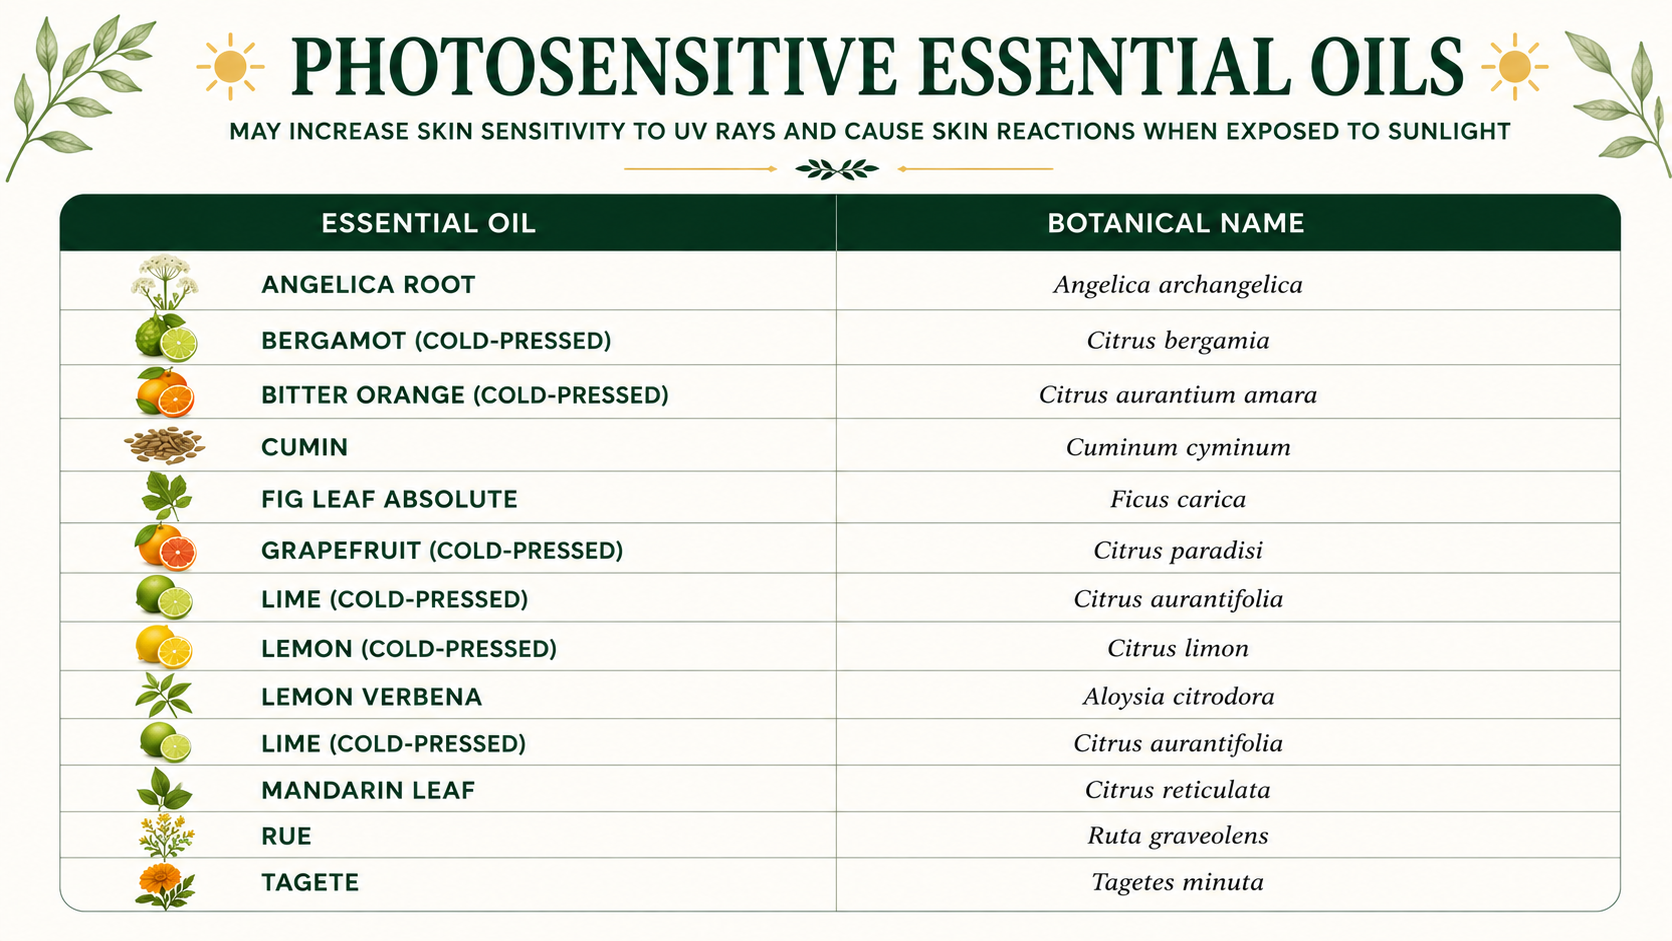
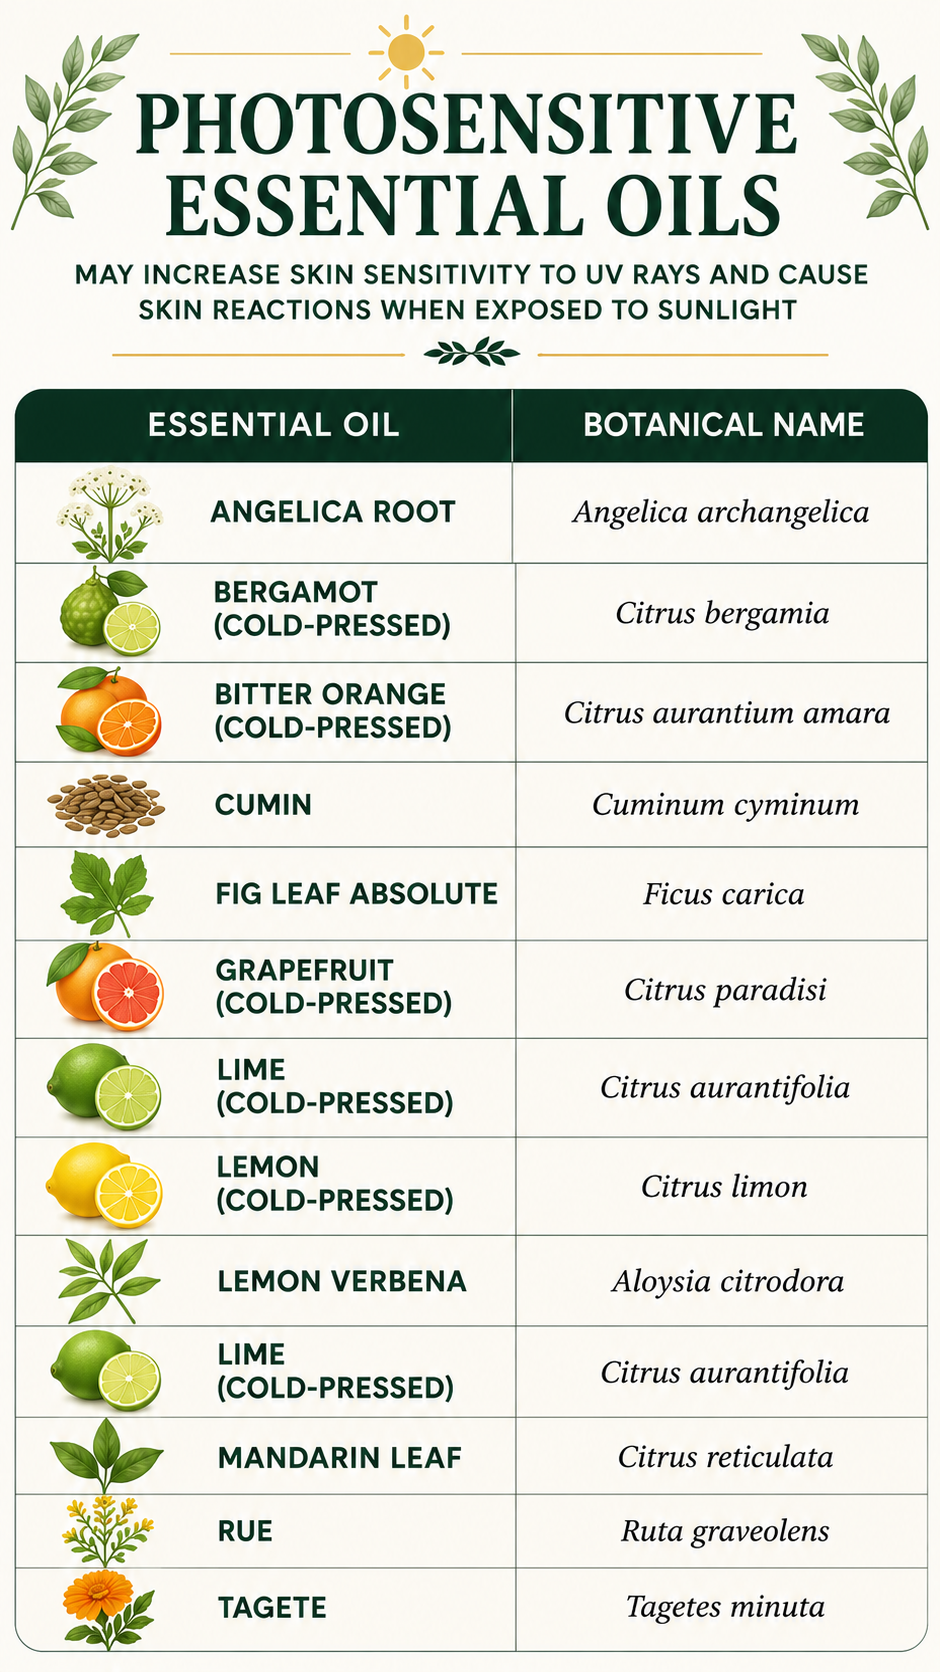
I recall earlier this year, I wanted to use a nice Bergamot scent to compliment a cologne I was creating but was warry about it’s photo-toxic properties.
Thankfully, I ended up sourcing a furocoumarins free or (FCF) version of Bergamot. Furocoumarins are a group of chemical compounds that are known to cause photosensitivity in some individuals. The FCF labeling on essential oils indicate that the manufacturer has removed the furocoumarins, meaning the oil is no longer phototoxic.
Cold Pressed vs. Steam Distilled
An Important Note: Some citrus essential oils that are phototoxic when cold pressed and are also available in steam-distilled versions. Steam distillation can eliminate the phototoxicity concern associated with furocoumarins, but the oil should still be used according to its individual safety dilution ratios.
For more information about essential oil phototoxicity, and the associated health risks to be mindful of, I have linked two great resources below to help you make the most informed decision before mixing any essential oils into your batch.
One is a simplified version and the other is more of a deep-dive.
Comprehensive Essential Oil Photo-toxicity Resource
Simplified Essential Oil Photo-toxicity Resource
Patch Testing
Aside from phototoxcicity, for skin conditions, skin sensitivities, and other contraindications, it is important to patch test an oil before using it to avoid any allergic reactions and to save you time, money, and frustration!
Before using a new essential oil or blend more broadly, It is recommended to dilute it appropriately using a carrier oil (coconut, jojoba, safflower oil, etc) and applying a small amount to a clean area of skin, such as the inside of your forearm.
Leave the area undisturbed and monitor it for 24 hours for redness, itching, swelling, burning, or other signs of irritation. If a reaction occurs, please wash the area and discontinue use.
To learn more about patch testing. I recommend checking out the below resource by Reality Pathing.
My Simple All-In-One Body Wash & Shampoo Recipe
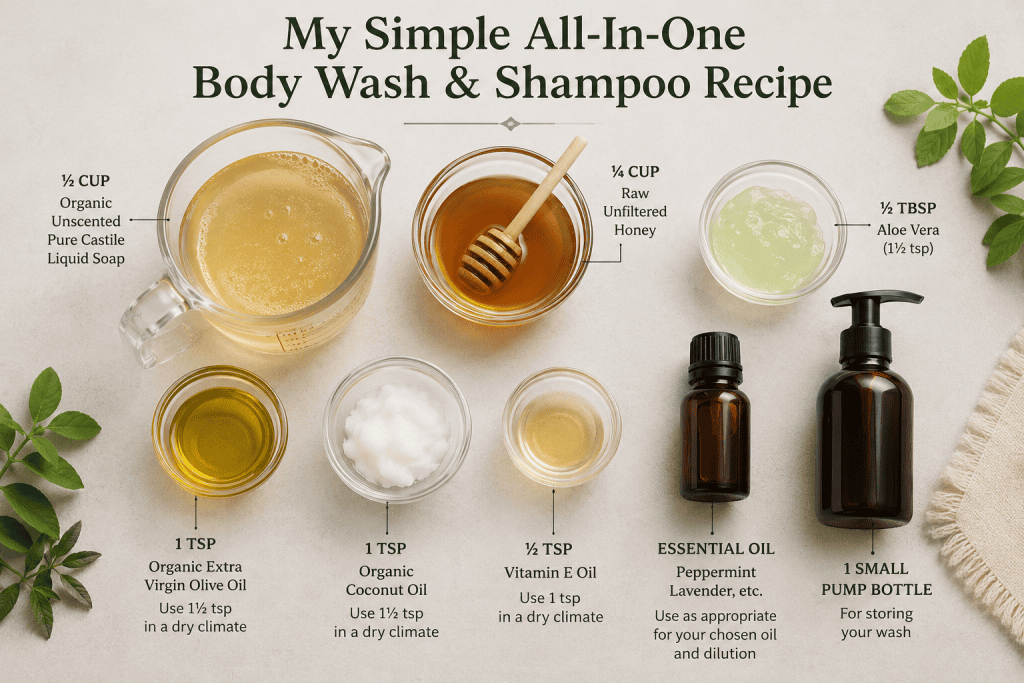
INGREDIENTS:
- ½ Cup Organic Unscented Pure Castile Liquid Soap
- ¼ Cup Raw Unfiltered Honey
- 1 Teaspoons Organic Extra Virgin Olive Oil,
- Use 2 tsp if you live in a dry climate
- 1 Teaspoons Organic Coconut Oil
- Use 2 tsp if you live in a dry climate
- ½ teaspoon Vitamin E Oil,
- Use 1 tsp if you live in a dry climate
- Essential Oil,
- Peppermint
- Lavender, etc.
- 1 Pump Bottle
Why I Chose These Ingredients
When I started putting this recipe together, I wanted more than a body wash and shampoo made with fewer ingredients. I wanted to understand what each ingredient was actually contributing to the finished product.
The Castile soap provides the cleansing action, while honey and aloe vera help support moisture and skin conditioning. Olive oil, coconut oil, and vitamin E add another layer of emollience, particularly for dry skin and hair. Essential oils are completely optional, but they allow you to customize the scent and other characteristics of the finished product.
Organic Unscented Pure Castile Soap — The Cleansing Base
Castile soap forms the foundation of this recipe and provides the actual cleansing action.
Traditionally made from vegetable oils rather than animal fats, true Castile soap cleans by surrounding oils, dirt, and other debris so they can be carried away with water. Choosing an unscented version also gives me control over what is added to the finished product rather than starting with a soap containing an undisclosed fragrance blend.
I specifically prefer a simple, organic Castile soap with an ingredient list I can understand.
Raw Unfiltered Honey — Moisture & Conditioning
Honey might seem like an unusual ingredient to put in body wash or shampoo, but there’s a reason it’s here.
Honey is a natural humectant, meaning it helps attract and retain moisture. That makes it particularly useful in a cleansing formula where I don’t want cleaning to come at the expense of leaving my skin and hair feeling excessively dry.
Raw honey also contains a complex mixture of naturally occurring sugars, enzymes, amino acids, organic acids, minerals, and other compounds. I use raw, unfiltered honey because it has undergone less processing than highly refined honey.
Olive Oil & Coconut Oil — The Moisturizing Oils
This is where I wanted to balance cleansing with conditioning.
Extra virgin olive oil acts as an emollient, helping soften and condition the skin while supplying naturally occurring fatty acids and antioxidant compounds.
Coconut oil is rich in fatty acids and has an unusual affinity for hair. Its lauric-acid-rich composition allows it to penetrate the hair fiber more effectively than many other oils, which is one reason coconut oil has been studied for reducing protein loss from hair.
I’m using relatively modest amounts because this is still supposed to function as a cleanser, not an oil treatment.
Vitamin E Oil — Additional Skin Conditioning
Vitamin E is a fat-soluble antioxidant commonly used in skin-care formulations. Here, I’m primarily including it as a conditioning ingredient alongside the olive and coconut oils.
One important distinction: vitamin E is not the preservative for this recipe. Antioxidants can help slow oxidation of oils, but that is different from preventing microbial growth in a water-containing product.
Essential Oils — Optional & Customizable
Essential oils are where you can personalize the recipe—but they’re optional, not necessary for the cleanser to work.
Peppermint can create a cooling, invigorating experience, while lavender offers a completely different aromatic profile. Other essential oils can be used depending on your preferences, but each oil has its own safety considerations, dilution limits, sensitivities, and—in the case of certain oils—photosensitivity concerns.
That’s why I don’t treat essential oils as interchangeable simply because they’re natural.
The Pump Bottle — More Important Than It Sounds
Finally, I use a pump bottle because it makes the finished wash easy to dispense while limiting how much you’re repeatedly dipping into or handling the product.
Storage: Store in a clean, tightly closed pump bottle and avoid introducing water into the container. Because this homemade recipe does not contain a broad-spectrum preservative and has not undergone microbial stability testing, make it in small batches and use within approximately 2–4 weeks. Discard sooner if you notice changes in smell, color, texture, or appearance.
DIRECTIONS:
- Get a mixing bowl to mix your ingredients.
- Measure all of the ingredients and place into the mixing bowl.
- Mix them well and add essential oil if desired for aromatherapy and other benefits. Please ensure you patch test and identify any skin sensitivities beforehand.
- After you have mixed all of the ingredients and dropped in your desired essential oil (optional), pour the mixture into your pump bottle and close.
Now you are ready to start using your homemade body wash, and sulfate-free shampoo!
A Simple Swap, Made with Intention
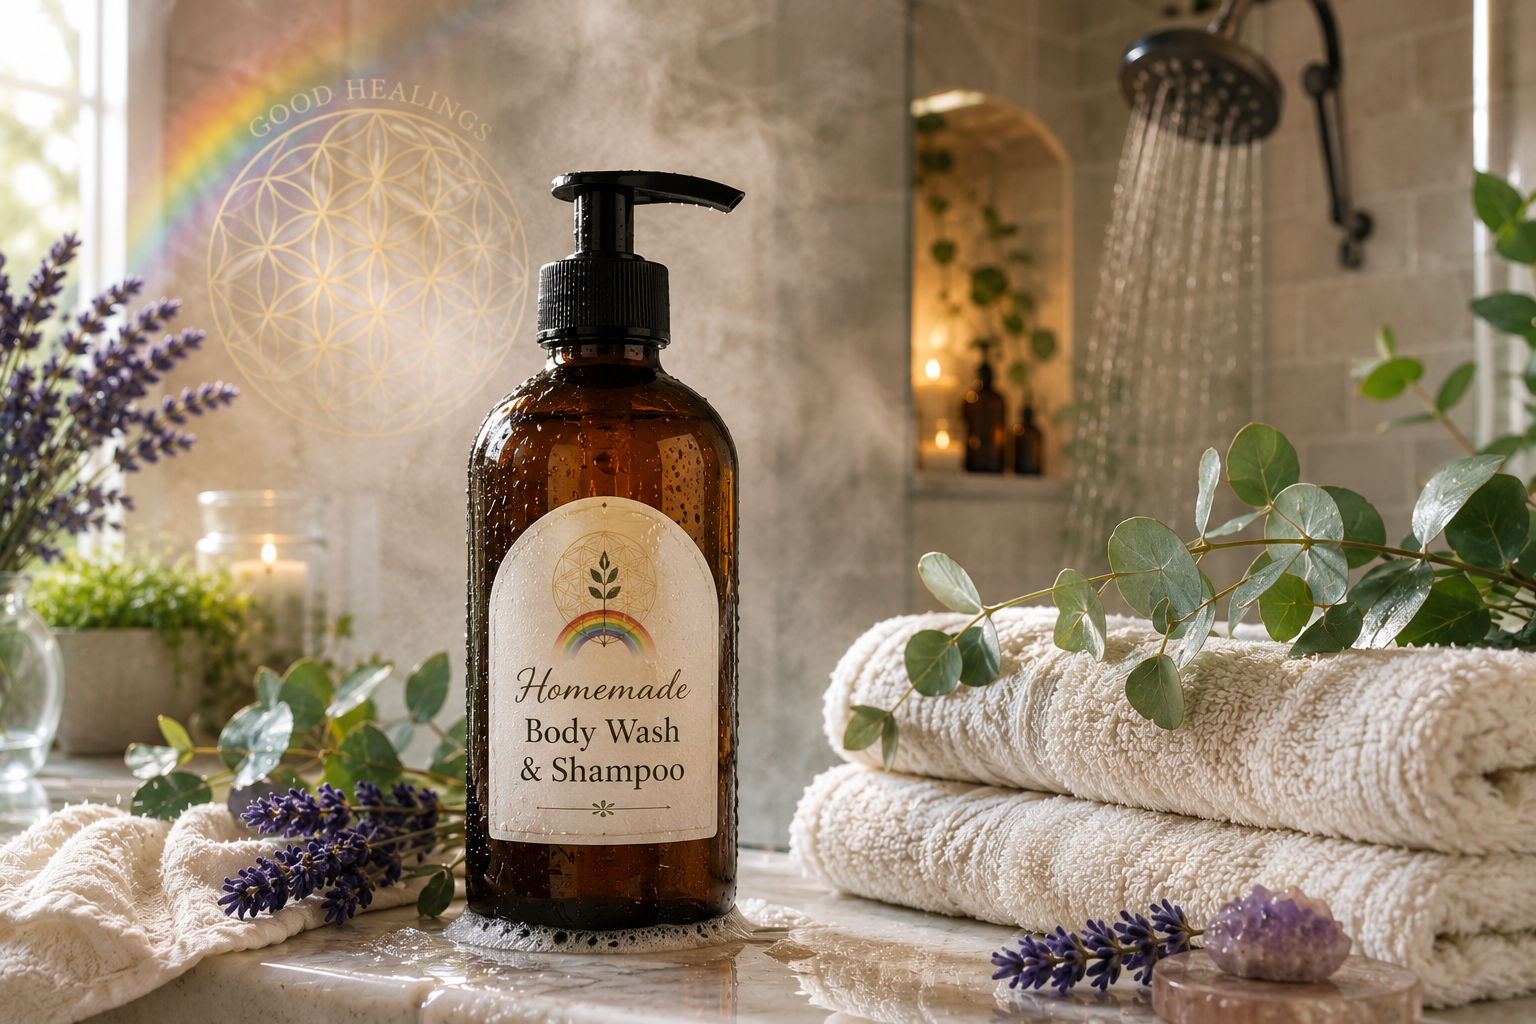
Making your own body wash and shampoo is one more way to become conscious of what you’re bringing into your home and putting on your body. It doesn’t have to be complicated or perfect, just intentional. Give yourself some points for removing yet another barrier to healing!
Experiment with the recipe, pay attention to how your skin and hair respond, and adjust it to what works best for you.
Know your ingredients. Trust your discernment. Keep it simple, and most importantly, keep it homemade.